springboot etiketine sahip kayıtlar gösteriliyor. Tüm kayıtları göster

Spring Boot Uygulamasını Heroku üzerinde Deploy Etme

Bu yazımızda sizlere spring boot ile yazılmış basit bir Rest api'nin heroku üzerinde nasıl deploy edebileceğimizi göstereceğim.


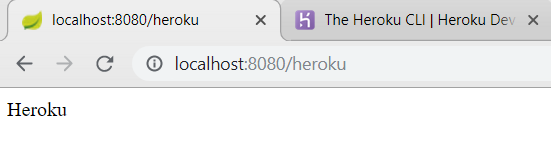
Önce spring boot ile basit bir rest servis yazalım ve bunun doğru bir şekilde çalıştığını onaylayalım.


import org.springframework.boot.*;
import org.springframework.boot.autoconfigure.*;
import org.springframework.web.bind.annotation.*;
@SpringBootApplication
@EnableAutoConfiguration
public class App {
public static void main(String[] args) {
SpringApplication.run(App.class, args);
}
}
view raw App.java hosted with ❤ by GitHub
import org.springframework.web.bind.annotation.RequestMapping;
import org.springframework.web.bind.annotation.RestController;
@RestController
public class OrderService {
@RequestMapping("/heroku")
public String getOrder(){
return "Heroku";
}
}
<project xmlns="http://maven.apache.org/POM/4.0.0" xmlns:xsi="http://www.w3.org/2001/XMLSchema-instance"
xsi:schemaLocation="http://maven.apache.org/POM/4.0.0 http://maven.apache.org/xsd/maven-4.0.0.xsd">
<modelVersion>4.0.0</modelVersion>
<groupId>com.todo</groupId>
<artifactId>hihi</artifactId>
<version>0.0.1-SNAPSHOT</version>
<packaging>jar</packaging>
<name>hihi</name>
<url>http://maven.apache.org</url>
<parent>
<groupId>org.springframework.boot</groupId>
<artifactId>spring-boot-starter-parent</artifactId>
<version>2.1.7.RELEASE</version>
</parent>
<properties>
<project.build.sourceEncoding>UTF-8</project.build.sourceEncoding>
</properties>
<dependencies>
<dependency>
<groupId>org.springframework.boot</groupId>
<artifactId>spring-boot-starter-web</artifactId>
</dependency>
</dependencies>
<build>
<plugins>
<plugin>
<groupId>org.springframework.boot</groupId>
<artifactId>spring-boot-maven-plugin</artifactId>
</plugin>
</plugins>
</build>
</project>
view raw pom.xml hosted with ❤ by GitHub


Buradan bir hesap oluşturuyoruz. Daha sonra buradan Heroku CLI'yı indirip kuruyoruz. Kurulum gerçekleştikten sonra login oluyoruz 

$ heroku login
heroku: Press any key to open up the browser to login or q to exit:
Opening browser to https://cli-auth.heroku.com/auth/browser/********
Logging in... done
Logged in as gguzelkokar.mdbf15@iste.edu.tr
view raw heroku hosted with ❤ by GitHub
Login olduktan sonra projemizin root konumuna gidiyoruz ve heroku create komutu ile yeni bir app oluşturuyoruz.

$ heroku create
Creating app... done, ⬢ calm-bayou-73911
https://calm-bayou-73911.herokuapp.com/ | https://git.heroku.com/calm-bayou-73911.git
view raw heroku hosted with ❤ by GitHub


https://calm-bayou-73911.herokuapp.com/ default olarak yüklendi.


Şimdi de projemizi git'e atıp commit edelim. Daha sonra uygulamamızı yaratırken oluşturulan "https://git.heroku.com/calm-bayou-73911.git'i" projemize bağlıyoruz. Github üzerinden boş bir repository oluşturduğunuzu düşünün ve localde'ki dosyalarınızı oluşturduğunuz uzak repoya göndermek istiyorsunuz(Github). Aynı işlem. Heroku bizim için herşeyi halletti. Git ile ilgili daha fazla bilgi almak isterseniz buradaki yazımı inceleyebilirsiniz.

$ git init
$ git add .
$ git commit -m "initial"
[master (root-commit) 68c1706] initial
24 files changed, 212 insertions(+)
...
$ git remote add heroku https://git.heroku.com/calm-bayou-73911.git
$ git push heroku master
...
...
remote: Verifying deploy... done.
To https://git.heroku.com/calm-bayou-73911.git
* [new branch] master -> master
view raw git hosted with ❤ by GitHub


Görev tamamlandı :). Bir sonraki yazıda görüşmek üzere.. İyi kodlamalar...


Spring Boot Uygulamasını Heroku üzerinde Deploy Etme

Bu yazımızda sizlere spring boot ile yazılmış basit bir Rest api'nin heroku üzerinde nasıl deploy edebileceğimizi göstereceğim. Önce ...